Glamping pods in winter sound like a dream: snow outside the window, a mug of something hot in your hands, and a snug little cabin all to yourself. But many travelers hesitate, worried that once the temperature drops at night, that cozy image will turn into a shivering, sleepless ordeal. The good news is that a well-built pod, booked and packed with a bit of know-how, can keep you genuinely warm all season long.
This guide walks you through what winter pods are actually like inside, how to choose one rated for cold weather, and when to book to get the best rates. You’ll also find a practical packing list, simple on-site habits that keep the heat in, and tips for enjoying the snowy setting to the fullest. By the end, you’ll know exactly how to stay warm and make the most of your winter pod trip.
What Glamping Pods in Winter Are Actually Like
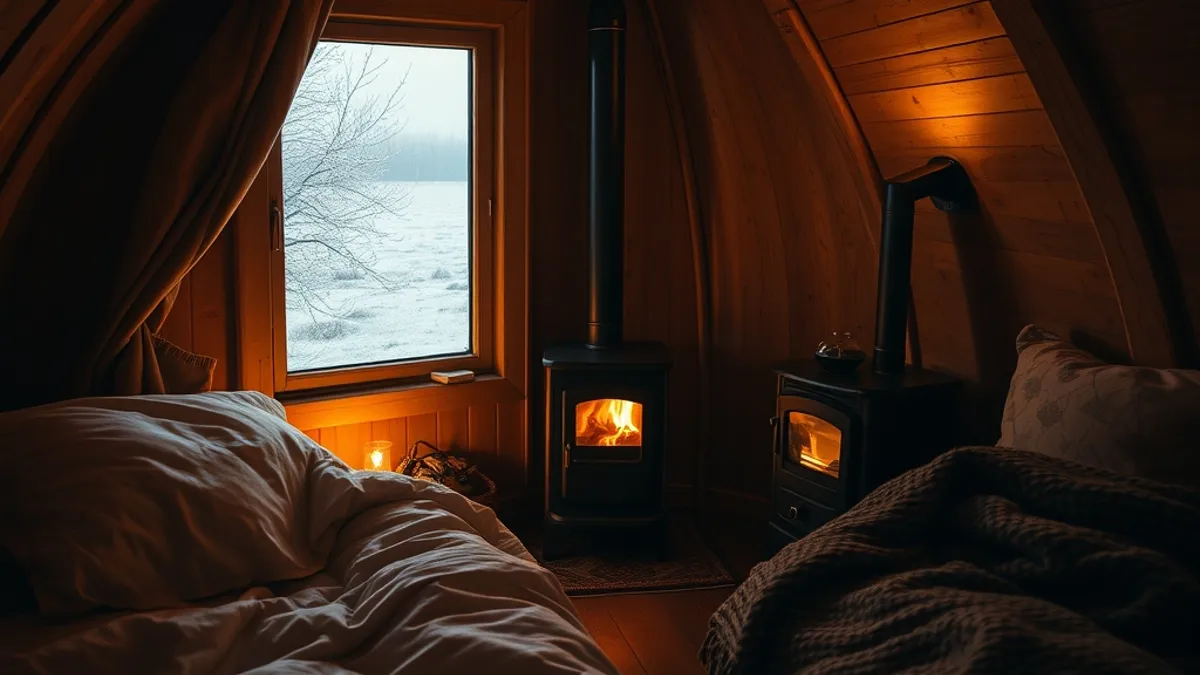
Forget the flimsy summer tents you may have slept in at festivals. A modern winter pod is essentially a small insulated timber cabin, complete with double glazing, a proper heating source and a real mattress on a bed frame. Many are built specifically for year-round use, with thick walls and sealed floors designed to keep the cold where it belongs — outside.
Warmth, sounds and cool corners
With the heating on, most well-insulated pods hold a comfortable 18-22°C overnight, which is plenty for a good sleep. That said, the warmth is not perfectly even. Entryways and any separate bathroom areas sit noticeably cooler than the main sleeping space, so keep slippers and an extra layer within reach for those first steps in the morning.
Expect a few quirks too. As temperatures swing between the warm interior and the freezing air outside, you will likely see condensation on the windows in the morning, and the timber structure may creak and pop as it expands and contracts. This is normal, not a sign of a faulty pod.
Short days, long evenings
Daylight is the biggest adjustment for many guests. In midwinter, plan your activities around roughly 8-10 hours of usable light, and be realistic about how much you can fit in. The upside is that long evenings by the heater have their own charm — bring a book and embrace the slower pace.
How to Choose a Pod Built for Cold Weather
Not all pods are created equal when frost sets in, so a few minutes of research before booking pays off enormously. A pod that feels magical in June can be miserable in January if it was never designed for serious cold. Start with the basics: check that the pod is rated for temperatures down to at least -10°C and has insulated walls and floor. Reputable operators state this clearly on their listings, and if you cannot find it, ask directly before you commit.
Heating is the next priority. A wood-burning stove or an electric radiator with a proper thermostat will keep a pod warm far more reliably than a basic portable heater plugged into a corner socket. If you want to see what a genuinely cold-weather stay looks like, this glamping trip by the Masurian lakes shows how slow winter travel works when the site is built for the season.
Facilities matter more in winter than in any other season. Outdoor toilets and shower blocks are the coldest part of any winter stay, so look for en-suite bathrooms or, at minimum, heated shower blocks within a short walk of the pod.
- Ask about the heating run time: some sites switch stoves or heaters to low overnight, so confirm whether you can top up the fire yourself if you wake cold.
- Check the water situation: in hard frosts, some rural sites turn off external taps, so ask whether drinking water is available inside or near the pod.
- Look at the pod’s orientation: a pod sheltered from the prevailing wind holds its heat better than one exposed on an open hillside.
- Confirm bedding thickness: most winter pods provide bedding, but a few budget sites supply only a duvet cover, so check what is actually included.
Finally, read recent winter reviews specifically, not summer ones. Summer feedback tells you nothing about how the pod performs in a real cold snap, while winter reviews reveal exactly which sites deliver on their cozy promises and which fall short.
Booking Timing and Winter Prices
Timing your booking well can save you real money and secure the best pods before they disappear. The main winter pod season runs November to March, and demand is far from even across those months. Christmas and New Year weeks sell out first, often months in advance, as travelers chase that festive-in-the-forest experience.
When to book
For December and January weekends, aim to book 2-3 months ahead. Midweek dates are much easier to secure at shorter notice, and many sites offer them with more flexible availability. If your schedule allows even one night from Monday to Thursday, you will have a far wider choice of pods and locations.
It is also worth deciding early which kind of winter trip you want. A coastal site feels different from a forest or lakeside one, and reading a detailed review of glamping at Longlands in Combe Martin can help you picture what a specific site delivers before you hand over a deposit.
What winter costs
Here is the good news: winter rates typically run 20-40% below peak summer prices, making this the cheapest time of year to try a premium pod that would be out of budget in July. The same insulated cabin with a wood stove costs noticeably less when booked for a gray February Tuesday than for a sunny August weekend.
One last check before you pay: confirm the cancellation policy in writing. Snowstorms occasionally force closures in mountain and northern regions, and you want to know exactly what happens to your money if the site cannot open. A clear, fair policy is a good sign of an operator who takes winter bookings seriously.
Packing List for a Warm Night in a Pod
Even the best-heated pod can dip in temperature overnight, so your packing list is your insurance policy. Think of it as a backup system: if the stove burns down or the heater cycles off at 3 a.m., your own body heat and layers keep you comfortable until morning. The goal is to sleep warm without needing to get up and tend the fire in the dark.
Start with what touches your skin. Thermal base layers worn to bed make a bigger difference than any single thick item, and a warm hat matters more than most first-timers expect — a surprising amount of heat escapes through your head while you sleep. Many seasoned winter pod campers simply wear their thermals and a beanie under the duvet and sleep straight through the night.
Then think about your feet and your surroundings. Pod floors, especially near the door, stay cooler than the rest of the cabin, and you will feel it the moment you swing your legs out of bed. A headlamp and a charged power bank round out the kit, since winter evenings are long and facilities are often a short walk away.
- Wool socks and insulated slippers: pack two pairs of wool socks — one for sleeping, one dry pair for daytime — so you never pull on damp ones, and slip them on before your feet ever touch the floor.
- Headlamp or lantern plus power bank: choose a headlamp with a red-light mode so you don’t blind your partner on late-night trips, and bring a power bank since cold temperatures drain phone batteries faster than usual.
- Extra blankets or a sleeping bag liner: most winter pods provide bedding, but for nights below 0°C a fleece blanket or a merino sleeping bag liner adds a real layer of warmth without taking up much bag space.
- Hot water bottle: fill it at the kettle before bed and slide it into the foot of your sleeping bag or under the duvet — it keeps feet warm for hours and costs nothing to run.
If you want a sense of how a well-equipped pod feels in practice, the Laghi Nabi review of glamping in Castel Volturno, Italy gives a good picture of what a comfortable setup looks like on site.
On-Site Habits That Keep the Heat In
Keeping a pod warm overnight is less about blasting the heater and more about steady, sensible habits. The pods that stay comfortable all night are the ones where guests manage heat and airflow deliberately rather than cranking everything up at bedtime and hoping for the best. A wood stove or electric radiator works best when it has time to warm the structure itself, not just the air. Timber walls and floors hold heat like a battery, so an hour of gentle heating in the evening pays off well past midnight. Follow a simple routine and you will wake up warm instead of wrestling with a cold stove at 3 a.m.
- Preheat before bed, then set it low. Run the wood stove or electric heater for about an hour as you wind down, so the walls and floor absorb heat. Before you sleep, turn it to a low setting rather than letting it burn out completely; a steady trickle of heat is far easier to maintain than a cold restart. If you are new to wood stoves, ask the site owner how the damper works on arrival — a few minutes of instruction saves a smoky, frustrating evening later.
- Seal the pod and cover the windows. Close the door firmly every time, even for short trips outside, and pull the curtains or blinds fully. They add a surprising extra layer over the double glazing and cut the chill you feel near the glass. If the pod has a draughty entryway, keep that door shut as well and use the main living space for your evening routine.
- Air the pod out each morning, not overnight. Condensation builds up on cold windows in any heated pod, and damp bedding or damp clothes make the whole space feel colder. Open a window or door briefly when you wake to clear the moisture, then reheat the space. Leaving a window cracked all night just dumps your heat outside and makes the stove work harder for no benefit.
- Stage tomorrow’s clothes by the stove. Lay your socks, base layers and jeans near the stove before bed so they hold gentle warmth. Keep them at a safe distance, never on or draped over the stove itself, and getting dressed in the morning becomes the easiest part of the day. This works especially well on frosty mornings when the floor and entryway are at their coldest.
None of these habits takes more than a minute or two, and together they make a real difference from evening until breakfast. Do them the first night and they will feel automatic by the second. The payoff is simple: you sleep better, the pod stays drier, and you start each morning with a warm space instead of a cold, damp one. It is the difference between a trip you endure and one you would happily repeat next winter.
Making the Most of the Winter Setting
Winter is exactly when a pod shines, because the setting does half the work. Snow on the roof, a glowing stove and a long quiet evening make for a stay you simply cannot replicate in July. The trick is planning around the short daylight rather than fighting it.
Use the daylight, enjoy the dark
Midwinter days are short, so plan walks and hikes for the middle of the day when the light is strongest. Many pod sites sit right at the edge of trails, so you can head straight out the door for a snow walk without driving anywhere. Once the sun drops, switch modes: that is the time for a book, board games, a slow dinner and, on clear nights, stargazing far from city lights.
Food, drinks and getting there
Bring a thermos and your own hot-drink supplies. Most pods have a kettle, but rural sites often have limited food options nearby in winter, when village shops and pubs cut their hours. Packing easy meals and plenty of tea, coffee or cocoa saves you a cold drive after dark.
Finally, check road access conditions before you set off. Some rural pod sites sit on ungritted lanes that become tricky after snowfall, so a quick look at local road reports and a message to your host can spare you a stressful arrival. A car with winter-ready tires is a sensible precaution in snowy regions, and it is worth asking the site what they recommend for the current conditions.
Wrapping Up Your Winter Pod Trip
If your biggest worry about glamping pods in winter is shivering through the night, the good news is that a well-chosen pod simply does not work that way. An insulated, well-heated pod rated for the local lows holds a comfortable temperature from lights-out to morning, with proper mattresses and solid walls between you and the frost outside. The cold you might feel is limited to cooler entryways and floors, which is exactly what thermal layers and slippers are for.
Two habits make the biggest difference: booking 2-3 months ahead for the popular dates, and packing thermal base layers and a warm hat as backup. Once you are on site, simple routines like managing the stove, closing the curtains and airing the pod briefly each morning keep it at 18-22°C all night. Have you tried a winter pod stay, or are you planning one? Leave a comment or share this article with a friend who needs convincing.