Many travelers love the idea of glamping in autumn and winter but worry the tent will be freezing the moment the sun goes down. The good news is that glamping heating and insulation are not mysteries: once you understand how heat is produced and where it escapes, choosing a warm stay becomes straightforward. This guide walks through how canvas structures actually hold warmth, which heating options you can expect, and what to check before you book.
We will cover how glamping heating and insulation work together, how to spot listings with genuine winter heating, and how wood stoves, propane and electric heaters compare in practice. You will also find insulation checks to run before booking, a packing list for cold nights, and safety habits for sleeping warm. With the right unit and a few simple routines, cold-season trips from October to March can feel just as comfortable as a summer stay.
How Glamping Heating and Insulation Actually Work
Glamping tents are a different animal from the nylon backpacking tents most people remember. Canvas and poly-cotton fabrics are much thicker and denser, so they block wind far better and hold warmth noticeably longer than thin synthetic camping tents. That said, fabric alone does not generate heat. On a cold night, even the best canvas tent will slowly lose warmth unless there is a heat source inside, which is why the stove or heater is the heart of any winter glamping setup.
What makes a unit four-season
Four-season structures such as yurts, geodesic domes and cabins go a step further than a standard bell tent. They typically add thermal liners behind the fabric, solid wooden floors instead of bare ground, and in the case of cabins, double glazing in the windows. Each of these features attacks a specific escape route for heat: the walls, the floor and the glass.
It helps to think of heating and insulation as two separate jobs. Heating raises the air temperature inside the tent, while insulation slows the loss of that heat through the floor, walls and roof. A powerful stove in a thin, uninsulated tent will burn through firewood while the heat leaks straight out; a well-insulated tent with a modest heat source stays comfortable for hours. The best winter stays combine both, and the rest of this guide shows you how to find them.
Choosing a Stay with Real Winter Heating
The single biggest mistake when booking a cold-weather glamping trip is trusting vague descriptions. “Cozy blankets provided” tells you nothing about whether the tent stays above freezing at 2 a.m. What you want is a listing that names an actual heat source: a wood stove, a propane heater or underfloor heating. Real four-season operators are proud of their heating and usually mention it in the first few lines.
Structure matters too. Yurts, geodesic domes and cabins are the safest cold-weather choices because they are built with insulation, solid floors and proper heating in mind. Bell tents are lovely, but they are best kept to shoulder season when nights are cool rather than genuinely cold. If you want to see what a well-set-up winter-ready site looks like, this glamping review from Combe Martin in the United Kingdom gives a good picture of how a properly equipped stay handles the cold.
Budget and timing also need attention. Four-season units generally cost 20-40% more than summer-only tents, which is fair given the insulation and equipment involved. Winter availability is limited, so for weekends between December and February, aim to book 2-3 months ahead or you will be choosing from the leftovers.
- Read recent winter reviews, not just summer ones. A tent can be delightful in July and miserable in January; guests who stayed in the cold months will tell you exactly how warm it actually stayed.
- Ask how firewood is supplied. Some hosts include a daily stack of seasoned logs, others charge per bundle, and a few expect you to bring your own, which changes both cost and convenience.
- Check what happens if the heater fails. A good host will mention a backup heat source or an emergency contact; silence on this point is worth a message before booking.
- Confirm water and bathroom access in winter. Outdoor showers and composting toilets can be far less appealing when the temperature drops, so know what you are signing up for.
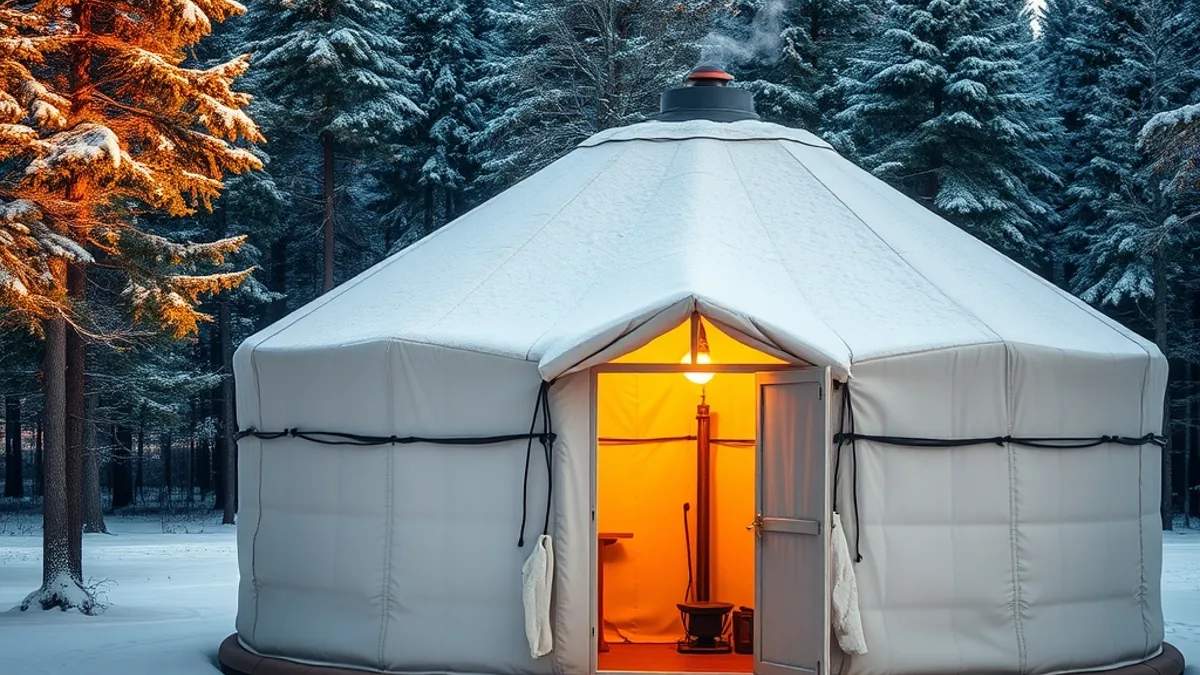
Heating Options Compared: Wood Stoves, Propane and Electric
Most glamping heat comes from one of three sources, and each behaves differently. A small wood stove is the classic choice and the most satisfying: it can raise the inside of a well-insulated tent by 15-20°C within an hour, and there is nothing quite like watching flames through the stove glass while rain hits the canvas. The trade-offs are real, though. The fire needs reloading overnight if you want it to last until morning, and the stove and flue need safe clearance from tent fabric, which a properly installed setup will handle.
Propane heaters deliver steady, controllable heat with no firewood chores, which makes them popular on sites without a wood supply. The key requirement is ventilation: propane burns up oxygen and produces combustion gases, so these heaters must be used in a unit designed for them, with vents or windows that can stay slightly open. Electric heaters are the simplest of all, but they only work on powered sites, and in most glamping setups they work best as a backup for taking the chill off rather than as the main heat source through a whole winter night.
Whichever system your unit uses, ask the host two direct questions before booking: how long the heat actually lasts overnight, and whether someone refills the stove during your stay. At serviced sites, such as the lakeside glamping stay in Castel Volturno, Italy, staff often handle the heating logistics for you, which makes a big difference on your first cold-weather trip.
- Find out who supplies and seasons the firewood. Wet or unseasoned logs burn badly, smoke heavily and give off far less heat, so ask whether the wood is stored dry.
- Ask how the stove is lit. Some hosts light the stove before you arrive so the tent is warm at check-in; otherwise, expect an hour of kindling work on arrival day.
- Check whether the heater has a thermostat or runs flat out. A thermostatic propane heater keeps an even temperature, while a simple model may leave you adjusting it through the night.
- Confirm carbon monoxide detection. Any unit with a fuel-burning heater should have a detector; this is a reasonable and normal question to ask a host.
Insulation Checks Before You Book
Before you pay a deposit, treat the floor as your first question. Ground contact is the biggest heat drain in any tent, because the cold earth pulls warmth out of everything touching it. A raised platform or a proper wooden floor creates a barrier that makes a cold night survivable instead of miserable. If a listing only shows a tent pitched on grass, assume the floor will be cold no matter how good the heater is.
Next, study the walls. Good cold-season units usually mention thermal liners, layered canvas or insulated wall panels somewhere in the description, and the photos should back this up. If you see a single thin canvas layer and no liner, that tent is built for summer. Some hosts of winter-ready sites, such as those offering lakeside glamping for slow travel, list these details clearly, so a vague description is often a sign to keep searching.
Wind matters more than most travelers expect. Moving air strips heat from thin walls far faster than still air, so an exposed hilltop tent can feel dramatically colder than an identical one tucked behind trees. Ask the host directly how sheltered the unit is and what the prevailing wind does in winter.
- Check the floor material in photos: wooden planks or a raised deck are good signs, while bare ground, thin rugs or a tarp floor mean you will feel the cold rising all night.
- Look for a door with a proper seal or vestibule: gaps under doors and around zippers let cold air funnel in and undo the work of your heater.
- Ask about roof insulation or a double-layer roof: heat rises, so an uninsulated roof loses warmth faster than the walls do.
- Confirm the temperature rating: a unit rated for outdoor lows between -5°C and 5°C is the realistic benchmark for cold-season comfort, so ask the host what the tent is actually rated for rather than guessing.
Packing and Bedding for Cold Nights
Even the best-heated tent cools down overnight, so your bedding does the work while the stove sleeps. Hosts usually supply blankets, but they vary wildly in warmth, and you have no control over what waits for you. Bringing your own down or wool bedding rated to around 0°C is the standard for cold-season glamping trips, and it lets you fine-tune your warmth instead of hoping for the best.
Clothing matters just as much as bedding. Thermal base layers worn from dinner onward keep your core warm without bulk, and a beanie for sleeping sounds silly but makes a noticeable difference, since you lose a lot of heat through your head. Insulated slippers protect you from the one surface a heater can never fix: the floor, which stays cool even in a warm tent.
Two cheap items earn their place in the bag every time. A hot water bottle filled at bedtime keeps your feet warm for hours, and a closed-cell foam mat slid under the mattress blocks the cold that seeps up from below. Neither needs power, neither can fail, and together they cost less than one night’s upgrade.
- Choose a sleeping bag liner or silk liner: it adds a surprising layer of warmth, keeps host-provided blankets away from your skin and dries overnight if your tent runs humid.
- Bring spare socks purely for sleeping: dry socks worn only in bed stay warm and damp-free, while socks worn all evening hold moisture that chills you at night.
- Pack a small thermos as well as a hot water bottle: it gives you a hot drink at 3 a.m. without relighting anything or walking to a shared kitchen in the dark.
- Vacuum-bag your spare layers: compressed clothing takes a fraction of the car space and doubles as an extra pillow once unpacked.
Safety and Overnight Comfort Habits
A warm tent is only enjoyable if it is also a safe one, and the rules here are simple but non-negotiable. Never sleep with an unattended fuel heater running. Before you get into bed, let the wood stove burn down to steady embers with the door closed, and switch off any propane or electric heater. A stove that was fine at midnight can behave differently at 3 a.m., and you will be asleep when it does.
Ventilation feels counterintuitive when you are trying to stay warm, but keep a window or vent cracked open anyway. A closed canvas tent traps the moisture from your breath, cooking and damp clothes, and that moisture condenses on cold walls and drips back onto your bedding by morning. The same trapped air is what makes carbon monoxide dangerous, so a small, steady airflow is one of the cheapest safety measures you have.
How you dress through the evening shapes how well you sleep. Layer clothing in stages instead of piling on everything at once the moment you feel a chill. Overheating early makes you sweat, and damp base layers pull heat away from your body later, leaving you colder than if you had added layers gradually. Start with a base layer when the stove is roaring, add a mid-layer as it burns down, and keep an extra fleece within arm’s reach for the coldest hour before dawn.
- Test the smoke and carbon monoxide alarm on arrival: press the test button when you check in, and if the unit has no alarm at all, ask the host for one before your first night.
- Keep a flashlight or headlamp by your bed: if you need to adjust a stove damper or reach a window latch overnight, you do not want to be searching for a phone light in the dark.
- Store firewood and matches within reach of the stove: a small overnight top-up is fine while you are awake, but only from a dry, ready supply, never from wood stored outside under snow.
- Know where the exterior door latch is in the dark: canvas doors and zippers behave differently from house doors, and practicing the exit once takes ten seconds and could matter in an emergency.
Warm Glamping, All Year Round
If you have ever skipped a glamping trip because you feared shivering the moment the sun went down, the good news is that it does not have to be that way. Warm glamping comes down to three things: a real heat source, an insulated floor and walls, and bedding rated near 0°C. Get those right and a canvas tent can feel as snug as a small cabin.
Yes, booking a yurt, dome or cabin for the cold months will usually stretch your budget by 20-40% compared with a summer-only tent, and December to February weekends tend to fill up fast, so plan 2-3 months ahead. But with the right unit and a few sensible habits, trips from October to March can be every bit as comfortable as a summer stay. If this guide helped you plan a cold-weather escape, leave a comment or share it with a fellow traveler.