A glamping trip packing list can make or break your stay. Photos of safari tents, yurts and domes promise comfort, but many travelers still arrive to find cold nights, muddy paths, buzzing insects or an unbearably hot canvas interior — simply because they packed for the brochure, not the season. What works in July rarely works in October, and a kit that suits a heated cabin leaves you shivering in a basic bell tent.
This guide breaks packing down season by season. We start with the essentials you need on every glamping trip, whatever the weather, then move through spring, summer, autumn and winter with specific clothing and gear suggestions. We also cover how to time your booking to match the season you want, and how to match your kit to the amenities your chosen site actually provides. By the end, you will have a checklist you can adapt to any month and any type of glamping accommodation.
What Every Glamping Trip Needs, Whatever the Season
Before you pack anything, contact your glamping site and ask exactly what is included. Most sites supply bedding and towels as standard, which means you can skip a bulky sleeping bag and simply bring a sleeping bag liner or an extra blanket for chillier nights. A five-minute email saves you hauling gear you will never use, and it also tells you whether cooking equipment, kitchenware, coolers or firewood are provided on site. Ask about the layout, too: some safari tents and domes sit close to a reception building, while others are a ten-minute walk down a grassy track, which changes how much you want to carry per trip. If the site runs a shop or café, note what it sells so you do not duplicate food and supplies you can buy on arrival.
The bigger surprise for first-timers is usually the infrastructure. Many glamping sites are semi-off-grid, with limited or no lighting inside the tent and few or no power outlets. Some rely on solar power that fades on overcast days, and showers or toilets may be in a shared block rather than en suite. That changes what counts as essential. The items below cover the gaps that catch almost every new glamping guest.
- Headlamp or lantern plus a power bank: a headlamp keeps both hands free for finding things in the dark, while a small lantern lights the tent interior for reading or card games. A power bank keeps phones and cameras charged when outlets are scarce or nonexistent, and a spare charging cable prevents a single frayed wire from ending your trip’s photography.
- Sturdy closed shoes: gravel paths, grass and woodland trails stay damp even in dry weather, and sandals offer no protection from sharp stones or morning dew. Broken-in walking shoes or light hiking boots handle nearly every glamping site, and a pair of sandals or slides is still handy for shared shower blocks.
- Small daypack: useful for carrying water, snacks and layers on short walks from your tent to shared facilities or nearby trails, so you are not making repeated trips back and forth in the dark or the rain.
- Refillable water bottle: many sites rely on a single water point or bottled water sales, so a bottle you can refill keeps you hydrated without constant trips.
- Dry bag or zip pouches: these keep phones, chargers and documents safe from dew, condensation and sudden rain — a real risk in any fabric shelter. Small pouches also make it far easier to find essentials in a dim tent or a duffel bag.
Packing for a Spring Glamping Trip
Spring looks mild in the forecast and then quietly freezes you after dark. From March to May, nights commonly fall to 5-10°C even when daytime feels pleasantly warm, so a warm midlayer, a beanie and thick socks belong in your bag even for a short, sunny trip. Dress in layers you can shed by mid-morning and rebuild by evening, and remember that fabric tents cool down fast once the sun drops.
Rain is the other spring constant. April showers turn grass paths and woodland trails to mud, so a waterproof jacket and quick-dry trousers matter far more than a fashion-forward outfit. Cotton jeans stay wet and cold for hours; synthetic or merino fabrics dry quickly and keep you comfortable between downpours. If you are heading somewhere green and watery, a lakeside setting such as glamping by the Masurian lakes shows exactly why quick-dry layers earn their place in spring.
Insects arrive as the weather warms. From late April onward, mosquitoes wake up with the warmer evenings, especially near water and in still air, so repellent should be in your bag before the season really starts.
- Warm midlayer options: a fleece or lightweight down jacket packs small but adds real warmth over a t-shirt, and it doubles as your evening layer around the fire pit.
- Beanie and thick socks: most body heat is lost through your head and feet, and tent floors stay cold overnight — a dedicated pair of sleep socks makes a noticeable difference.
- Waterproof jacket with a hood: choose one that packs down small, since spring rain often arrives in short bursts and you will want it within reach rather than buried in a bag.
- Quick-dry trousers: convertible or lightweight hiking trousers handle mud, dew and drizzle far better than jeans, and they dry overnight if you hang them in the tent.
- Insect repellent: bring a spray or lotion with an effective active ingredient, plus a few patches or a plug-in option if your unit allows one, since tents are not insect-proof.
Packing for a Summer Glamping Trip
Summer glamping is mostly about managing heat and sun rather than cold. On days above 25°C, breathable clothing is the foundation: loose linen, cotton or technical fabrics that let air move. Add a wide-brim hat, sunglasses and SPF 30+ sunscreen, especially since many glamping sites offer little natural shade around tents and communal areas.
Nights bring a different problem. Canvas traps the afternoon heat, so a tent that felt like an oven at 4 p.m. can still be stuffy at bedtime. Pack light sleepwear and skip the heavy duvet — a single sheet or sleeping bag liner is usually enough on warm nights, and it packs down to almost nothing. If your tent is unshaded, a small battery-powered fan or a cooling towel you wet and drape around your neck makes sleeping far more bearable.
There is also a planning side to summer. July and August are the busiest months at most sites, so book 3-6 months ahead to get your pick of tents and dates rather than settling for what is left.
- Breathable daytime clothing: pack light colors that reflect sun, and bring one long-sleeved, loose layer for sun protection during long days outdoors without overheating.
- Wide-brim hat and sunglasses: choose a hat with a brim wide enough to shade your neck, since you will spend hours in open ground around the tent with little cover.
- SPF 30+ sunscreen and after-sun care: reapply through the day, and pack aloe or a similar after-sun product, because mild sunburn is one of the most common summer glamping complaints.
- Single sheet or sleeping bag liner: cotton or silk liners weigh almost nothing, keep the provided bedding fresh, and give you exactly one layer of cover on warm nights.
- Small fan or cooling towel: a compact battery fan moves air in stuffy canvas, while a cooling towel offers instant relief after hiking or on arrival at a tent that has been baking all afternoon.
Packing for an Autumn Glamping Trip
Autumn is a beautiful time to go glamping, but the season keeps you honest with your packing. From September to November, evening temperatures typically fall to 5-12°C, and rain is a regular visitor. That means warmth and waterproofing are not optional extras — they are the core of your bag.
Start with layers you can add and remove through the day. Days can still feel mild, but once the sun drops, you will want a fleece and an insulated jacket ready, with wool socks on your feet before you even notice the chill. A good rule: if you would wear it for a cool evening walk at home, bring it.
Ground conditions matter as much as the air temperature. Dew-soaked grass and muddy trails are common in autumn, so your footwear and outer shell need to cope with damp underfoot even when the sky is clear.
A few items that make the season genuinely comfortable:
- Waterproof boots with decent tread — smooth-soled shoes turn slippery on wet gravel and muddy paths, and wet feet on a cold evening can end an outing early.
- A packable rain shell — one that folds into its own pocket lives in your daypack and covers you for sudden showers without adding bulk.
- A thermos — a hot drink at sunrise, before the site’s kitchen is open or the fire is lit, changes the whole feel of a cold morning.
- Hand warmers — cheap, light and ideal for fireside evenings when you want to stay outside longer than your gloves allow.
If you want a sense of how cozy an autumn trip can be when the kit is right, our review of a glamping stay in Combe Martin in the United Kingdom shows what this season looks like done well.
Packing for a Winter Glamping Trip
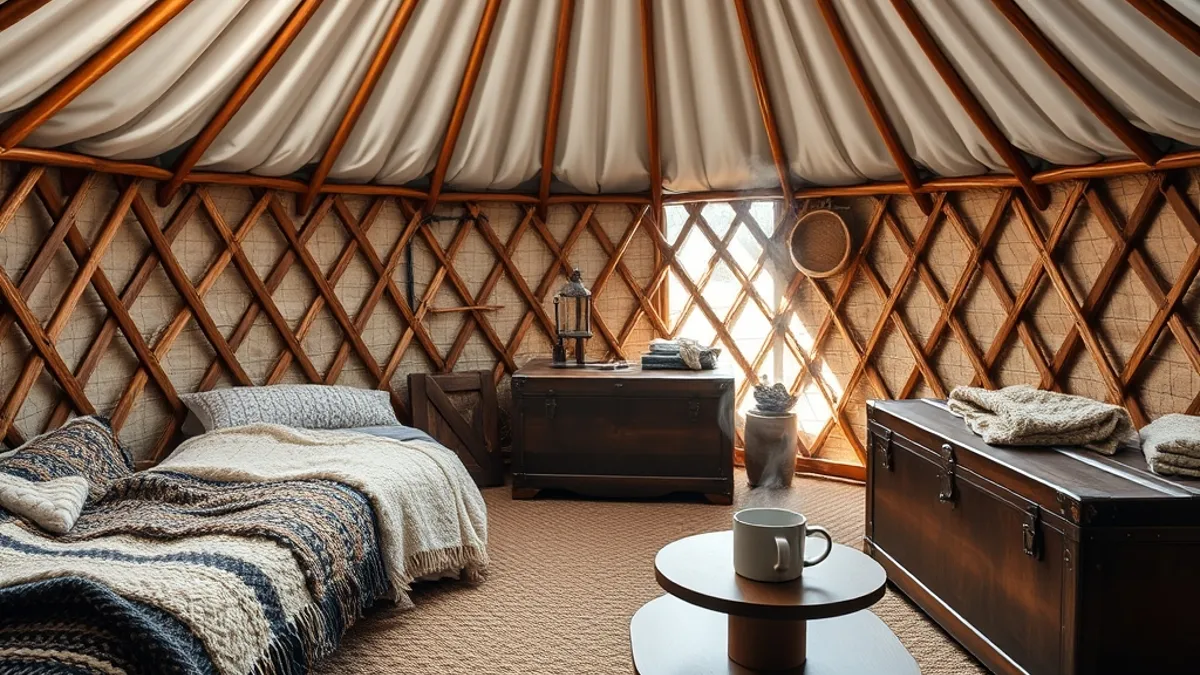
Winter glamping can be wonderful — but only if you treat it as a proper cold-weather trip. Start with the accommodation itself: choose a heated yurt, cabin or a 4-season rated tent rather than a standard canvas setup. Then build your packing around sub-zero nights, because even heated units can cool considerably once the fire or heater cycles down overnight.
Your base layers do the heavy lifting. Pack thermal base layers rated for sub-zero temperatures and wear them as the foundation of everything, from a sunrise walk to sitting inside with a book. Over that, insulation is the name of the game, from head to toe.
Do not underestimate the ground and the small hours. Heat in glamping units varies widely overnight, and what felt warm at 9 pm can feel very different at 3 am. Extra bedding and a way to warm the bed itself are the two upgrades winter travelers rarely regret.
Beyond the basics, these items earn their space in a winter bag:
- A down or synthetic insulated jacket — synthetic insulation keeps some warmth even if it gets damp, which matters in misty or snowy conditions; down packs smaller but needs to stay dry.
- Insulated gloves and a warm hat — a large share of body heat is lost through the head, and numb hands make everything from zipping a tent to holding a mug miserable.
- Waterproof winter boots with good grip — icy boardwalks and frozen grass are the hazards to plan for, so tread and ankle support count more than looks.
- Extra blankets and a hot-water bottle — fill the bottle before you get into bed and it turns a cold sleeping bag into a welcoming one within minutes.
One last tip: ask the site exactly how the unit is heated and whether the heat runs all night. Answers vary a lot between safari tents, cabins and yurts, and the reply should shape how much insulation you bring.
How to Time Your Booking and Match the Kit to the Site
Good packing starts before you pack at all — it starts with your booking window. For peak-season trips in July and August, reserve your glamping spot well ahead of time. Popular sites with a small number of tents fill quickly, and by the time summer weather is on the forecast, the best units are usually gone. For shoulder months, booking 1-2 months ahead is typically enough, though a quick earlier check never hurts if you have specific dates or your heart is set on a particular unit.
Match your kit to the unit, not the brochure photo
Safari tents, yurts and domes may all be called glamping, but they differ sharply in heating, cooking facilities and bathroom access. Some units have full kitchens and en-suite bathrooms; others share a washblock or offer little more than a stove and a kettle. Read the site’s amenities list carefully, then pack to fill the gaps — a camp stove and cookware if cooking is not provided, for example. A stay at Under Canvas Lake Powell – Grand Staircase in Big Water, United States is a good example of how much the setting shapes what you actually need on site.
Ask about terrain and exposure
Before you decide on footwear and layers, ask the site two simple questions: what is the ground like underfoot, and how exposed is the unit to wind and weather? A tent on a sheltered, gravel path near the facilities calls for a different kit than one at the end of a muddy field trail. Sites are usually happy to answer, and the reply tells you whether to pack waterproof boots or sandals, a windproof shell or something warmer for the evenings. Five minutes of questions saves a bag full of the wrong gear.
Your Season-By-Season Glamping Checklist at a Glance
Glamping photos make every tent look effortless, but the gap between the picture and reality usually comes down to packing. A canvas tent or dome can feel magical on a warm afternoon and chilly by 9 p.m., and the fix is simple: adjust your bag to the season. The year-round basics — lighting, power, footwear and confirmed bedding — form the core of every packing list, whatever month you travel.
From there, the season decides the extras. Spring and autumn hinge on warmth and rain layers, summer on sun protection, winter on serious insulation. Booking 3-6 months ahead for peak season and matching your kit to the site’s amenities completes the checklist. Work through it once before you zip up your bag, and you’ll arrive ready for the weather instead of surprised by it. If this checklist helped you plan your trip, leave a comment or share the article with a fellow traveler.