Many glamping domes promise unforgettable nights under the stars, but plenty of them sit just outside a glowing town or beneath a haze of light pollution. A transparent roof only helps if the sky above it is actually dark, and photos taken on marketing shoots rarely tell you which. Without a way to separate genuine dark-sky stays from clever hype, travelers often pay a premium and end up counting a handful of stars through a washed-out sky.
This guide gives you a practical checklist for choosing between stargazing domes with confidence. You’ll learn what separates a well-designed dome from a generic one, how to read light pollution maps before you book, and how to time your stay around the moon and the Milky Way. We’ll also cover the questions worth asking hosts, the regions where dark-sky dome stays cluster, and how to budget and book smartly so cloud cover doesn’t turn your trip into an expensive disappointment.
What Makes a Dome Stay Good for Stargazing
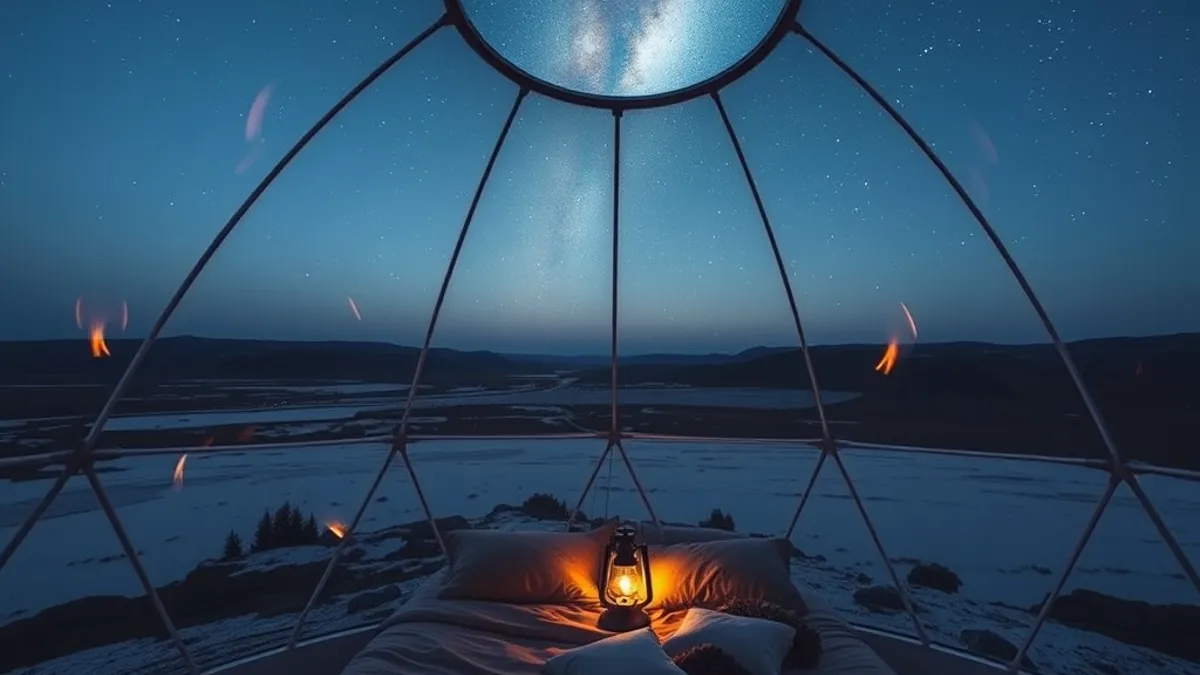
Not all domes are built with stargazers in mind, and the differences show up the moment night falls. The most important feature is where the transparent material sits: a panel directly above the bed lets you watch the sky from under a blanket, while a side window only gives you a narrow slice of the horizon. Design details like this separate a true astronomy stay from a regular glamping tent with a gimmick.
Comfort and surroundings matter just as much as the roof. A dome in a forest clearing may feel secluded, but trees block the very part of the sky you came for, and cold interiors send everyone running for the heater instead of lying back and looking up. Lighting on the property is the final piece of the puzzle, since even one bright floodlight can ruin your night vision for half an hour. Before you book, work through this checklist:
- Panel placement: transparent or skylight sections should sit above the bed, angled so you can see the sky while lying down, not just from a chair across the room.
- Heating: a heated interior lets you keep panels clear and stargaze comfortably in colder months instead of choosing between warmth and visibility.
- Terrain: the property should sit in open ground with an unobstructed horizon; a forest clearing cuts off large portions of the sky and traps ground mist.
- Site lighting: look for dim, warm-spectrum exterior fixtures, or a policy of switching lights off at night, so your eyes can fully adapt to the dark.
Reading Light Pollution Maps Before You Book
Light pollution maps are the single most useful booking tool for a dark-sky trip, and they’re free. Before you fall in love with a dome’s photos, spend ten minutes checking what the sky above it actually looks like from space. A dome with a crystal-clear roof panel is only as good as the darkness sitting above it, and marketing photos shot on long exposure can make a mediocre sky look far better than it is. A quick map check tells you the truth before you hand over a deposit, and it takes less time than reading the reviews.
- Find the exact coordinates. Use lightpollutionmap.info or Dark Site Finder and drop the pin on the dome’s precise location, not the nearest town. A property can sit in a dark zone while its listing address points somewhere brighter.
- Check the Bortle class. The Bortle scale runs from Class 1, a pristine dark sky, down to Class 9 in inner-city conditions. Aim for Bortle Class 3 or darker. Class 4 still shows the Milky Way, but with noticeably fainter detail, so treat it as a compromise rather than a target.
- Zoom in on nearby towns. A small city roughly 20 miles away can wash out an entire section of the horizon, especially in the direction it sits. Note which compass points face the glow, then picture where your dome’s transparent panels actually face.
- Cross-check satellite views. Switch to a satellite layer and scan the surrounding land for new construction, quarries or highway glare that maps may not yet reflect in their data.
Maps are updated periodically, so a site that was pitch black a few years ago may no longer be. If the Bortle class looks borderline, compare several properties in the same region and favor the one with the darkest reading and the fewest light sources on its doorstep. As a rough rule, areas over 60 miles from a major city usually reach Bortle Class 3 or darker, which makes them a sensible starting point when you’re shortlisting. Ten minutes of map work now can save you a whole night of squinting at a washed-out sky later.
Timing Your Stay Around the Moon and Milky Way
Even the darkest site on earth looks mediocre under a bright moon, so timing matters as much as location. The lunar cycle is predictable, which means you can plan your trip months ahead and know exactly what the sky will offer.
New moon dates are the sweet spot: for roughly 5 to 7 nights each lunar month, the moon stays out of the evening sky and the stars reach their full brightness. If you’re chasing the Milky Way in the Northern Hemisphere, aim for June to August, when the galactic core rides high and shows its brightest, most detailed arc. Full moon weeks are the ones to avoid if faint deep-sky objects are your goal, because moonlight washes out dim stars and nebulae almost completely. A few extra planning habits help too:
- Check moonrise and moonset times for your specific dates, since a moon that sets early still leaves you prime evening viewing hours after it disappears.
- Build in a buffer night if you can, so one cloudy evening doesn’t cost you your only chance at a dark sky.
- Match the moon phase to your targets: bright moonlit nights are actually fine for viewing the moon itself and bright planets, just not for faint deep-sky objects.
A little lunar homework turns a gamble into a plan, and it costs nothing to check before you commit to dates.
Questions to Ask Hosts About Their Stargazing Domes
The best dome in the darkest location can still disappoint if the host treats the transparent panels as a photo opportunity rather than a genuine stargazing feature. Before you book, ask directly whether the clear sections above the bed can be removed, opened, or shaded, and whether you are allowed to keep them uncovered throughout the night. Some hosts close blinds by default for privacy or insulation, which defeats the whole purpose of your stay. It is also worth confirming that the panels stay clear of condensation, since fogged-up plastic is a common complaint in cooler months.
Lighting practices matter just as much as the panels themselves. A single bright porch light or motion-sensor floodlight can undo an otherwise perfect dark-sky site, so get specifics rather than vague promises about “eco-friendly” lighting. Ask when lights are switched off and who controls them.
Here are the questions worth putting to hosts before you commit:
- Panel access: Can you operate the shades or removable panels yourself in the middle of the night, or does someone from staff need to do it?
- Lighting schedule: Are path and deck lights switched off after a set hour, and is there a main switch inside the dome you control?
- Equipment: Does the dome provide a telescope, binoculars, or star charts, and if so, what size and quality? If not, a simple pair of binoculars from home will reveal far more than the naked eye.
- Neighbor glow: How close are other domes or cabins, and are their exterior lights visible from your transparent panels? A lit unit nearby can wash out your patch of sky.
A good host will answer these questions happily and in detail, often with photos of the interior at night. Evasive or generic replies are usually a sign that the dome looks better in listing photos than it does under the stars, so trust your instincts and keep asking until you get concrete answers.
Where Dark-Sky Dome Stays Cluster
Certain regions simply do dark skies better than others, and knowing where dome stays cluster helps you narrow your search fast. Desert landscapes lead the pack: the American Southwest combines Bortle Class 1 to 2 skies with dry air and frequent clear nights, so cloud cover is less of a gamble than almost anywhere else.
Southern Europe offers a different trade-off. Mountain valleys there deliver genuinely dark skies, and spring and autumn temperatures stay mild enough that you can lie under a transparent panel without bundling up or running the heater all night.
Coastal options deserve attention too. Exmoor in the UK holds dark-sky reserve status, and dome stays have appeared in the surrounding countryside. For a sense of what a stay in that part of England feels like, this glamping review from Combe Martin gives a firsthand look at the area’s quiet, rural character.
Lakeside and forest glamping sites can also work well, provided they sit far enough from urban glow. A useful rule of thumb: locations more than 60 miles from a major city usually reach Bortle Class 3 or darker skies.
- Desert bonus: Low humidity in the American Southwest means fewer hazy nights and sharper star contrast through binoculars or a telescope.
- Mountain bonus: Higher elevation in southern European valleys puts you above some of the low-lying haze that dims horizon views at sea level.
- Coastal bonus: Dark-sky reserve status means the region has formal protections against light pollution, so the skies are less likely to degrade before your trip.
- Lakeside bonus: Open water in front of a dome gives you an unobstructed horizon toward the lake, ideal for watching stars rise.
Budgeting and Booking Your Dome Night
Stargazing domes span a wide price range, so it helps to know what your money buys. Typical rates run from about $120 to $400 per night, with the premium end usually reserved for domes that feature full transparent roof panels rather than just a skylight window. Location and season push prices in either direction.
Timing is the biggest lever you control. Summer new-moon weekends are the most in-demand dates on the calendar, and the best domes book out early. For those prime nights, plan on reserving 2 to 6 months ahead rather than hoping for a late deal.
If your dates are flexible, shoulder seasons work in your favor. Stays in April, May, or September often cost noticeably less than peak summer, while the Milky Way viewing season stretches roughly from March to October, so you still get reasonable dark-sky hours.
- Compare inclusions: At the top of the price range, check whether heating, private bathrooms, and telescope access are included, since these add-ons can justify the higher rate.
- Midweek advantage: Booking a Tuesday or Wednesday in summer can be easier and cheaper than a Friday or Saturday around the same new moon.
- Weather risk: Cloud cover can ruin a stargazing trip with no refund, so read the cancellation policy carefully before paying; some hosts offer rescheduling credit rather than money back.
- Length of stay: If clouds are likely, a two-night stay doubles your odds of at least one clear window compared to a single night.
Budget realistically, book around the moon rather than around your calendar, and read the fine print. That combination gets you the best value dark-sky night your money can buy.
Wrapping Up Your Dark-Sky Dome Search
Most glamping domes promise starry nights, but only a handful actually deliver them. The difference comes down to three things you can verify before booking: transparent panels positioned above the bed, skies at Bortle Class 3 or darker on a light pollution map, and hosts who switch off exterior lighting at night. If a listing only shows photos of cozy interiors, it is telling you nothing about the sky above them.
Once you have found a dome that passes those checks, timing does the rest. New moon dates between June and August deliver the best Northern Hemisphere viewing, with the Milky Way core at its brightest. Book 2 to 6 months ahead to secure those prime nights, and expect rates in the $120 to $400 per night range depending on region and season. Have you stayed in a dome with genuinely dark skies? Share your experience in the comments or pass this article along to a fellow stargazer.