Safari tent glamping in winter can be magical — a wood stove crackling, frost on the canvas, stars you never see in summer. But a tent that looked dreamy in summer photos can turn miserable in freezing temperatures, so what should you actually verify before booking a winter safari tent? The gap between a cozy night and a shivering one usually comes down to a few practical details that hosts don’t always mention up front.
This guide walks you through the checks that matter most: how winter stays differ from summer ones, what to confirm about heating and insulation, whether the bathroom and kitchen actually work in cold weather, how to pick the right destination and dates, and the booking and cancellation questions worth asking. We finish with a short checklist and the key questions to put to your host before you pay a deposit.
Why Safari Tent Glamping in Winter Is Different From Summer Stays
The biggest difference between seasons comes down to one material: canvas. Unlike a solid cabin wall, canvas offers very little insulation, so once the sun goes down, the tent loses heat fast. That means the heat source and the heating design matter far more than tent size, decor or the view from your deck. A huge tent with a weak stove will feel colder than a smaller one with a properly sized, well-placed one.
Fewer sites, fewer dates
Availability also shrinks sharply in the cold months. Some operators close their sites entirely between November and March, while others only partially winterize — a few tents stay open while facilities are scaled back. So the tempting photos on a site’s homepage may show tents that aren’t even bookable in January. Always check the winter calendar directly rather than assuming a year-round operation.
There is a genuine upside, though. Winter rates often run 20-40% below summer prices, and you get quieter grounds, more attentive hosts and a very different atmosphere. But that discount is only a good deal at sites genuinely equipped for cold weather. A cheap winter booking at a summer-oriented site is not a bargain — it’s a cold night with a plug-in heater. The sections below cover exactly how to tell the difference before you pay.
Heating and Insulation: The First Things to Check
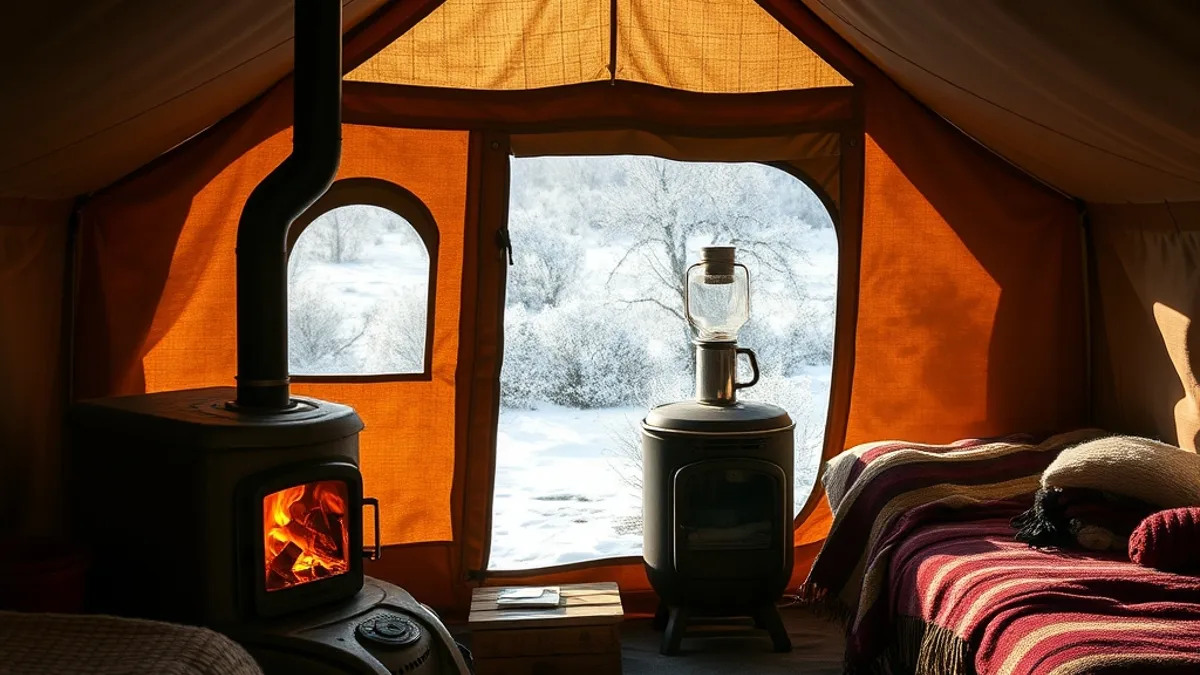
Start every winter inquiry with the stove. A proper wood-burning stove is the backbone of a comfortable cold-season tent, and it’s the feature that separates winter-ready sites from summer ones with a token heater. Confirm the tent actually has one — not “a heater” — and ask how often it needs reloading. Expect to feed it every 3-4 hours overnight, which tells you two things: whether it’s sized for the space, and whether you’ll be waking up at 2 a.m. to add logs.
Next, look at the tent’s construction. Double-layer canvas, insulated flooring or a lined roof make an enormous difference in how long heat lingers. A well-built tent with a working stove should hold an indoor temperature of 18-20°C, which is the standard to aim for when you ask hosts direct questions. Some operators describe their setups in detail on request; a review of a site like Laghi Nabi in Castel Volturno, Italy shows the kind of specifics worth collecting before you commit.
Then ask the overnight question: does the heating run all night, or does it switch off when the fire burns down? The answer shapes how you pack and sleep.
- All-night burn design: some stoves are sized so a full load of hardwood smolders until morning — ask whether the host supplies enough wood, and whether it’s seasoned hardwood or softwood that burns out faster.
- Backup electric heaters: ask if one is provided and whether there’s a power outlet inside the tent, since a small electric heater on a thermostat can carry you through the hours between stove reloads.
- Extra bedding: confirm whether thick winter duvets, hot water bottles or extra blankets are included in the rate or available on request, because packing layers is easier when you know what’s already there.
Bathroom and Kitchen Facilities in Cold Weather
Bathrooms are where winter glamping trips most often disappoint. A tent with a beautiful en-suite bathroom in July may be a shared block 100 meters away in January — and that walk, on nights when temperatures sit between -5°C and 5°C, changes the whole experience. Ask directly whether the bathroom is en-suite and heated, or shared and outdoors. If it’s shared, ask how far it is and whether the path is lit and cleared.
Water is the second weak point. Pipes that run fine in summer can freeze in deep winter, and unheated sites sometimes shut off outdoor taps entirely as a precaution. Verify that the water supply is frost-protected — insulated or heated pipes, or an indoor plumbing run — so you’re not brushing your teeth from a bottle on the third morning.
Finally, don’t assume food service runs as normal. Low season often means reduced hours or a paused kitchen, and a site that serves full breakfast in August may offer only a self-catering kitchen in February.
- Kitchen access: ask whether the communal kitchen stays open all winter, whether it’s heated, and whether cookware, a working kettle and a fridge are available — an unheated kitchen in January is barely usable.
- Breakfast service: if breakfast is advertised, confirm it’s served daily in the low season, at what time, and whether it’s delivered to the tent or eaten in a shared lodge.
- Hot water reliability: ask whether showers have consistent hot water in freezing weather, since some sites limit hot water hours when demand is low and solar systems underperform.
Choosing the Right Destination and Season Window
Where you book matters as much as which tent you book. In mild-winter regions like coastal Portugal, southern Italy or Japan’s Pacific side, nights between November and March tend to sit closer to 5°C than -5°C. That difference changes everything: a single wood stove can hold a comfortable evening, you can walk to the bathroom without layering up like an expedition, and mornings feel fresh rather than punishing.
Snow destinations: beautiful, but demanding
Snow destinations such as Lapland or Canada trade some of that comfort for atmosphere — frozen landscapes, silence, and the chance of northern lights. The trade-off is that stove quality becomes critical, not optional. Ask exactly what model the tent uses, how the heat is distributed, and how the site handles deep cold before you commit. If a host answers these questions confidently and in detail, that is usually a good sign.
Size matters more in winter too. You will have thick coats, snow boots, extra blankets and probably a bigger bag than in summer. Aim for tents of at least 25-30 m² for two adults so winter gear and boots fit without crowding the stove or the bed. A tent that feels roomy in July can feel cramped in January.
If you want a middle ground, lake regions with proper winter infrastructure can work well — this Masurian lake glamping review for slow travelers shows what a well-run cold-season site looks like in practice.
Booking Timing, Cancellation and Price Checks
Winter glamping books differently from summer travel. Fewer sites stay open, popular dates fill faster than you might expect, and weather adds a layer of uncertainty that summer rarely has. A little planning prevents most of the disappointment, so it pays to treat the booking itself as part of the trip rather than an afterthought. Here is how to approach it:
- Reserve 2-3 months ahead for regular winter weekends. Sites that stay open through the cold season often run at reduced capacity, so the best tents — the ones with the strongest stoves and heated bathrooms — go first. Booking early also gives you time to ask the host questions before paying, which matters more in winter than in any other season.
- Allow 4+ months for Christmas and New Year dates. The holiday period is the one winter window that behaves like peak summer: demand spikes, availability shrinks, and flexible travelers lose out. If a festive stay under canvas is the goal, book as soon as the site opens its calendar for those dates.
- Confirm the minimum stay before you build your itinerary. Many winter sites require two or three nights because of changeover work — airing out canvas, cleaning stoves and resetting the tent between guests takes longer in the cold. Check this early so it shapes your travel dates rather than clashing with them.
- Read the cancellation policy line by line. Winter weather can make travel plans less predictable than in summer: a snowstorm, flooded road or ferry cancellation can stop a trip from happening. Look for a policy that offers a credit or reasonable refund for weather-related cancellations, and note the deadline for changes before you commit.
One more practical point: because winter is the low season for most glamping operators, you will usually find some discounting compared with summer — but the cheapest option is rarely the warmest one. Treat the price gap as a signal to double-check heating, insulation and bathroom arrangements rather than a reason to book on the spot. A modest saving means nothing if the tent is too cold to sleep in, so weigh the rate against what the site actually offers in the cold months.
Questions to Ask the Host Before You Pay
Good hosts expect questions, especially in winter, and the way they answer tells you almost as much as the answers themselves. Before paying, send a short message covering the points below, and pay close attention to whether the replies are specific or vague. A host who genuinely runs the site in winter will know the details without checking. A host who hesitates, or answers in generalities, may be operating a summer tent in a season it was never built for. Reviews help too: look for photos showing the tent actually set up in the cold season, ideally from recent winter guests rather than promotional shots taken in July. It is also worth checking how the site describes itself overall — this Under Canvas Lake Powell – Grand Staircase review shows what clear, detailed glamping communication looks like, and it is a reasonable standard to expect from any operator.
- Ask for recent winter guest reviews or cold-season photos. Specifically request pictures taken between November and March, showing the tent exterior in snow or frost and the interior with the stove lit. This confirms the site genuinely operates in winter and shows you the real setup, not a stylized summer version.
- Confirm the backup plan if the stove fails overnight. Ask three things: is there a backup electric or gas heater in the tent, can you reach staff at night (and how quickly), and what is the refund or relocation policy if heating cannot be restored? A prepared host answers all three without prompting.
- Check road access and parking distance to the tent. Ask whether the access road is plowed or treated when snow is forecast, whether you park next to the tent or in a lot further away, and how far you would carry luggage on foot. A 300-meter walk on a summer path is a different experience at -5°C with a suitcase.
The Winter Glamping Checklist in Short
Before you commit to a winter safari tent, a short checklist can save you a cold, disappointing night. Put heating, insulation and a heated bathroom above views and extras. A wood-burning stove that runs all night, double-layer canvas and warm flooring matter far more than a pretty deck or a panoramic window when temperatures drop outside.
Then make two practical choices. Pick a mild-winter destination unless you specifically want deep snow, since comfort and atmosphere trade off directly. Book 2-3 months out, look for recent winter reviews and photos, and confirm backup heating and the host’s plan if the stove fails before you pay. Get these details right, and a tent that looked dreamy in summer photos can be just as enjoyable in the cold season. If you’ve done a winter glamping trip yourself, share your experience or questions in the comments below.